Having nearly five million eCommerce websites worldwide, Shopify has established itself as a robust and powerful eCommerce Content Management System (CMS) that has experienced impressive growth in the past decade.
Despite its rapid expansion and strong online presence, Shopify was relatively slow in incorporating integration with Google Analytics 4 (GA4), which added complexity to tracking web analytics goals.
The integration of Shopify with GA4, known as the Shopify-GA4 connector, was finally introduced in May 2023, arriving less than two months before the discontinuation of Universal Analytics (UA).
In the following sections, we will guide you through the process of setting up the GA4 Channel App and suggest additional steps you can take to ensure your Shopify website is fully prepared.
Purpose of the GA4 Channel App
The GA4 Channel App simplifies the task of connecting your Shopify website with your GA4 account. This integration facilitates the transmission of core GA4 metrics to your GA4 account, including data points like sessions, page views, and user counts.
Additionally, the GA4 Channel App incorporates supplementary GA4 eCommerce events, such as:
The app also captures extra parameters linked to these events, such as:
These parameters enhance the existing eCommerce event data.
Step 1: Removing Existing Tracking Codes from Shopify Settings
This initial step is somewhat contingent. Before the Shopify connector was available, several workarounds were used to enable eCommerce event and conversion tracking on Shopify websites.
If you employed such a workaround, it’s crucial to remove this code to prevent duplicate tracking across the site. Without removal, a purchase event could trigger twice on the website, leading to inaccurate revenue reporting.
For those uncomfortable with this process, it’s advisable to engage a developer to handle the code removal and subsequent testing.
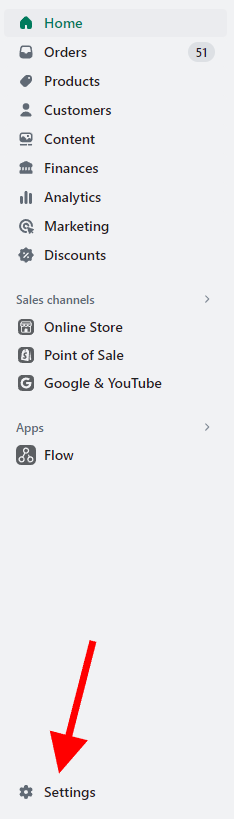
To start, go to your Shopify dashboard and select ‘Online Store’. If you haven’t implemented the GA4 connector, you can review the existing code by accessing the Shopify Admin area and navigating to ‘Settings’ located at the bottom left corner.
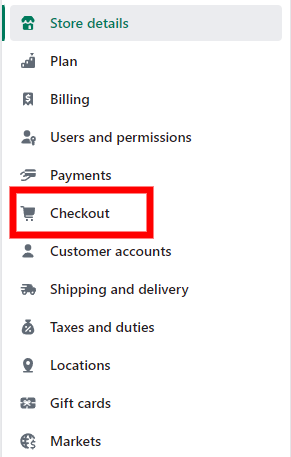
Then on the left-hand side, click on Checkout.
Please scroll to the bottom and examine whether there is any code present in the “Additional Snippets” section. It’s important to check for any code that might be directed towards your current GA4 account. There could potentially be extra code intended for other applications like HotJar or Microsoft Clarity. If you’re uncertain about which code to remove, it’s advisable to consult a developer.
If this section is empty, then you’re in good shape and there’s no need for concern.
However, if there is code present, you should proceed to remove it. I recommend copying and pasting the code to a location where you can easily access it again, such as Visual Studio or a basic notepad.
You’ll also want to make sure and remove the existing tag from the Shopify theme. A developer will have to do this part, but the code they’re looking for should look like this:
<!– Google tag (gtag.js) –> <script async src=”https://www.googletagmanager.com/gtag/js?id=G-XXXXXXXXX”></script> <script> window.dataLayer = window.dataLayer || []; function gtag(){dataLayer.push(arguments);} gtag(‘js’, new Date()); gtag(‘config’, ‘G-XXXXXXXXXX’); </script>
The new Channel app will manually insert the tracking code here so you don’t need to keep this.
Now that we’ve cleaned up your Shopify dashboard, it’s time to set up the Google Channel App.
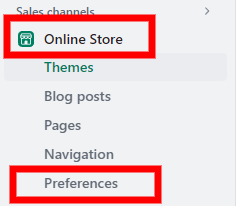
Go back to your dashboard, click on Online Store, and then click on Preferences.
Once inside, you’ll see a yellow box in the Google Analytics section.
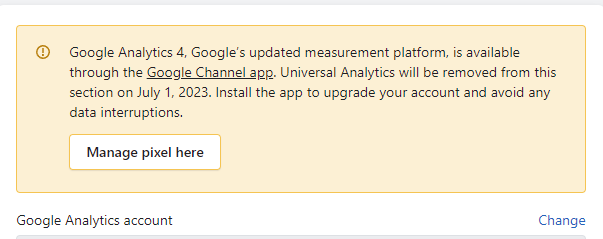
Click on Google Channel app (of course).
From here, you’ll be taken to a setup screen where you’ll see a big green button to ‘Add Sales Channel’.
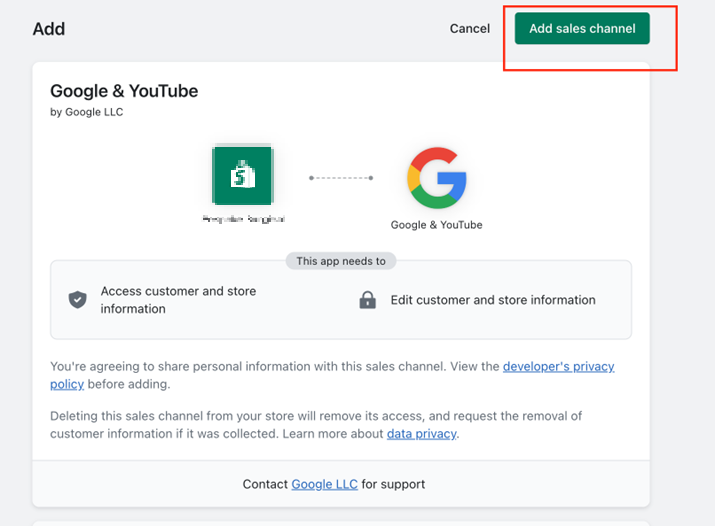
After clicking here, you’ll be taken to another screen to connect your account.
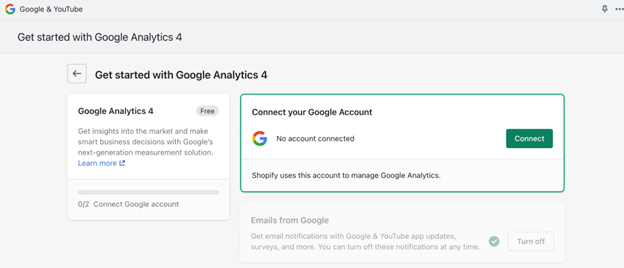
Go ahead and click on “Connect” to get set up.
Then, you’ll be asked to choose the right Google Account to connect Shopify and your website. Choose whichever email has the highest level of access to your GA4 account.
You’ll then have to choose your GA4 property. If you’re managing one site, then that should be a breeze (unless you are very lost).
Once you’ve connected, you’re finished here!
With everything connected and settings saved, it’s time to test and make sure it’s working.
To do this, head to your Google Tag Manager (if you have one installed) and enter the Preview Mode.
Here, you’re going to double-check and ensure that nothing is double-counting. If you see events double counting, you’re going to want to go back and find that extra tracking code. You can ask a developer for help.
Then, you’ll want to navigate to your shopping area and click on an item.
Once you do, you should see view_item pop up in your GTM preview mode.

Great! It’s only popping up once and not double-counting.
If you have a test account to use, you can go through the entire purchase funnel.
While we’re at it, let’s test and make sure events are popping up in our GA4 DebugView.
GA4 Debugview
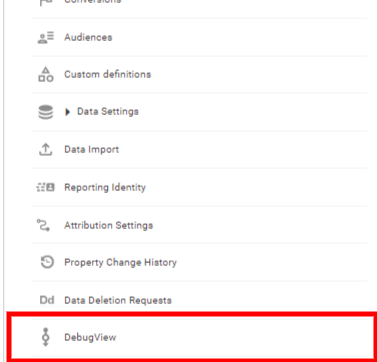
Head to your GA4 account, click on the Admin icon at the bottom left, then click on DebugView in the middle column.
If you’ve already completed the events, then items should have already begun populating inside the DebugView.
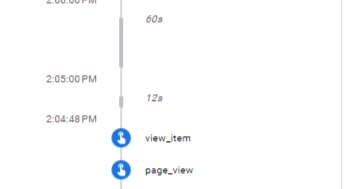
Here, we can see that our view_item event popped up right after we viewed our item, excellent!
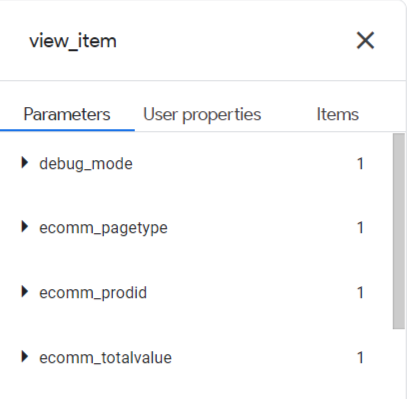
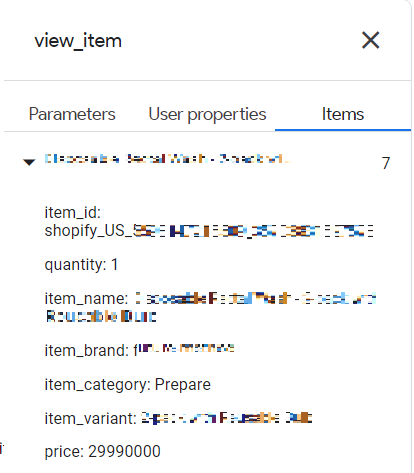
We can also see the parameters previously listed populate the parameters tab.
If you don’t have Google Tag Manager installed on your site, you can use a third-party tool called the Analytics Debugger.
You can use this tool to actively debug your site and ensure everything is loading properly. I can vouch for this tool, as it’s incredibly useful.
Once you add the plugin to your browser, use the Inspect tool by pressing CTRL+SHIFT+I on Windows or CMD+SHIFT+I on Macs.
At the top of the window, you will either see the Analytics Debugger available or have to use the two right-facing arrows to select the plugin. Click on the tool and then hit the Start Debugging button under the fashionable duck.
Once you click debug, it will refresh the page and you’ll see events pop up.
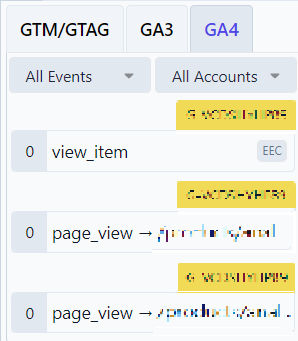
Success! We can see our view_item event pop up. You can go through the same steps in the purchase funnel if you want to see all steps populate, but it looks like we are ready to go.
GA4 tends to be on the tortoise side of things when it comes to reporting, so wait 24-48 hours before you check and see if additional information has been collected.
After you’ve done so, head back into your GA4 account and go to the Monetization report.
From there, you’ll see a list of reports to zero in on.
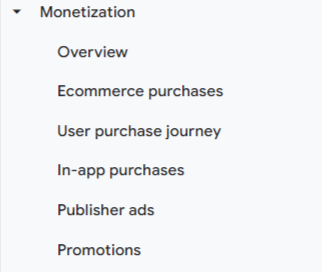
If you’re looking for simple eCommerce reporting, Overview and Ecommerce purchases will be your go-to.
Overview is just what it sounds like, a general overview of your eCommerce performance. You’ll be able to see total revenue, purchases, top items, and more by scrolling through this page

The purchases section is where you can dive in a bit deeper and see a more detailed view of your items.

Drawbacks of the GA4 Connector App
Although this application significantly simplifies the implementation and setup process, it does come with certain limitations.
Regrettably, there are some events that are notably absent from the app’s functionality, which would be valuable to track for any eCommerce website. Among these pivotal events are:
Refund
Remove from Cart
View Cart
View Promotion
Add to Wishlist
While having these events would be advantageous, they are presently not included in the Connector App. While there is a possibility that this might change in the future, for now, we’re constrained by the app’s existing capabilities.
If you wish to incorporate these events, it might necessitate exploring third-party applications or undertaking custom configurations independently. For those pursuing this route, involving a developer would be beneficial.
Conclusion
The GA4 connector app offers a streamlined setup process for individuals seeking to link their Shopify site with their GA4 account. Despite some limitations, it serves as a commendable initial step for those interested in delving into the data pertaining to user engagement and eCommerce transactions.